ThermoPro reverse engineering 2: A crash course in BLE

Summary
This post describes the process for capturing data from the TP25, and looks in a little more detail at the characteristics and advertisements it uses. The next post describes trying to interpret the actual data being sent...
- I followed the Nordic Semiconductor fundamentals course.
- There are some slightly tricky steps getting their devices set up - described below
- I think it's important to check that you have the correct driver installed. This nearly caused me to give up in frustration!
- Data from the TP25 gets captured! And it's true, we do need to send special commands to the device to get it to send back temperature data.
Next steps: take a look at the raw data
Choosing Nordic
In the last post I'd come to the conclusion that I needed to do two things:
- Learn more about Bluetooth Low Energy
- Be able to see the raw data being exchanged between the device and the app.
Number 2 relies on some kind of sniffer. I don't need anything too fancy expensive, and after some googling I keep
seeing good things about the
Nordic nRF sniffer. Plus, Nordic
have an online course describing how both
BLE and their sniffer work.
Given that a sniffer is about $10, this seems like the way to go. In the end, being in the UK I struggle to find a nRF52840 dongle where the shipping is less than the cost of the device, so I buy both the dongle and an nRF52840 DK from Mouser - buying the DK allows for free shipping, albeit the total cost is slightly higher. Plus having two devices makes it possible to follow the entire course more easily. (And who doesn't love having more gizmos?)
The course
If your knowledge of BLE is relatively low, as mine is, I strongly recommend doing the Nordic course. There are a couple of things I found didn't Just Work, I'll describe those later. But there's a few highlights that I can summarise here. I'm skipping big chunks of knowledge, but this should be enough to understand the TP-25.
- There are two types of advertising - passive and active. A device will send passive advertisements unsolicited. It may indicate that it can be 'scanned'. If the client sends out a scan request, the device will respond with the active advertising response.
- GATT organises data into "profiles", "services" and "characteristics". These form a tree:
- A profile may contain zero or more services (although a zero-service profile doesn't sound useful!)
- A service may contain zero or more characteristics
- Characteristics can be readable, writeable, notifiable or indicatable
- Readable and writeable are probably self-explanatory
- Notifiable means that the device will send a special message to the client indicating that the value in a characteristic has changed.
- Indicatable is not relevant to us.
- Various permissions can be assigned to characteristics - again, it turns out these are not relevant to us.
- Services and characteristics are described in an attribute table.
- Each row of the attribute table has an ID or handle associated with it. The handle increments by 1 for each row.
- Each service has a row in the attribute table describing it.
- Immediately after a service comes all descriptors for the characteristics relevant to it. A single characteristic will likely span several rows of the attribute table.
- The exact layout isn't super important to us here.
- Connections are simply where the client periodically sends a message to the device saying "we're connected". It is necessary to be connected in order to access the GATT attributes.
- There are various pairing and encryption options that can be associated with devices and required by the characteristics. Fortunately none are used by the TP25.
Pain points
Windows partial lock-up when setting the device name, or the device seems to not be writable
The Nordic course takes you through installing the nRF Desktop Tools and suggests running the Getting Started app. At a certain point, that app asks if you want to set a device name. When I did this, my Windows system essentially locked up - the Nordic app was non-responsive, Windows explorer didn't work, even Ctrl+Alt+Del didn't bring up the usual menu.
The only escape was a hard reboot.
The other symptom is that none of the Segger apps can communicate with the Nordic board - they instead produce a variety of relatively inscrutable error messages.
It turns out this can happen if the J-Link device has the wrong driver installed. You can see if the driver is correct or not in the Windows device manager. Look for the J-Link device (it's a USB device) and see if it has a yellow exclamation point on it. If so, follow these instructions.
Then it should work perfectly!
Newly built images don't get flashed to the device
Early on the Nordic course gets you to change the flash rate of an LED on the board by changing a constant in the code. When I did this, I'd build and flash the image, but the flash rate remained resolutely unchanged.
It turns out that you need to make sure you have the right Application selected in the nRF tools in VS Code.
You will see a box like this one:
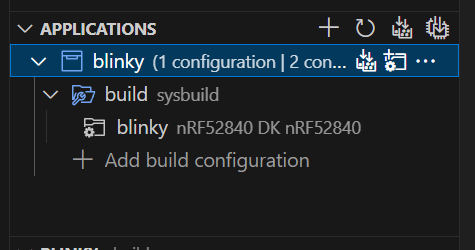
My mistake was having the grey coloured item at the bottom selected. Select either of the two blue ones, then click flash in the bottom window and everything should work as expected.
I genuinely do not understand why this is, but I don't think it'll be important for me.
Intellisense produces a bunch of red error squiggles
Intellisense loves to produce red squiggles underneath all the Zephyr and bluetooth headers. The fix is simple, but seems to be needed on a regular basis.
Simply change Intellisense to use the nRF Connect configuration...
Do this by bringing up the command palette (Ctrl + Shift + P for me) and running "C/C++: Select Intellisense Configuration". Then choose "Use nRF Connect for VS Code"


The sniffer isn't 100% reliable
My first attempts at sniffing connections (as opposed to just watching the advertising) were quite frustrating. I'd see the advertising. I'd make sure Wireshark was configured to watch the device I wanted to sniff. I'd connect - and no packets would be captured. I know that the docs say the sniffer occasionally misses a packet (fair enough) so it might not see the connection, but this was happening every darn time.
I don't know why, but the sniffer just seems to get stuck like this sometimes. Unplugging it, closing Wireshark, plugging it back in and starting Wireshark again does the trick.
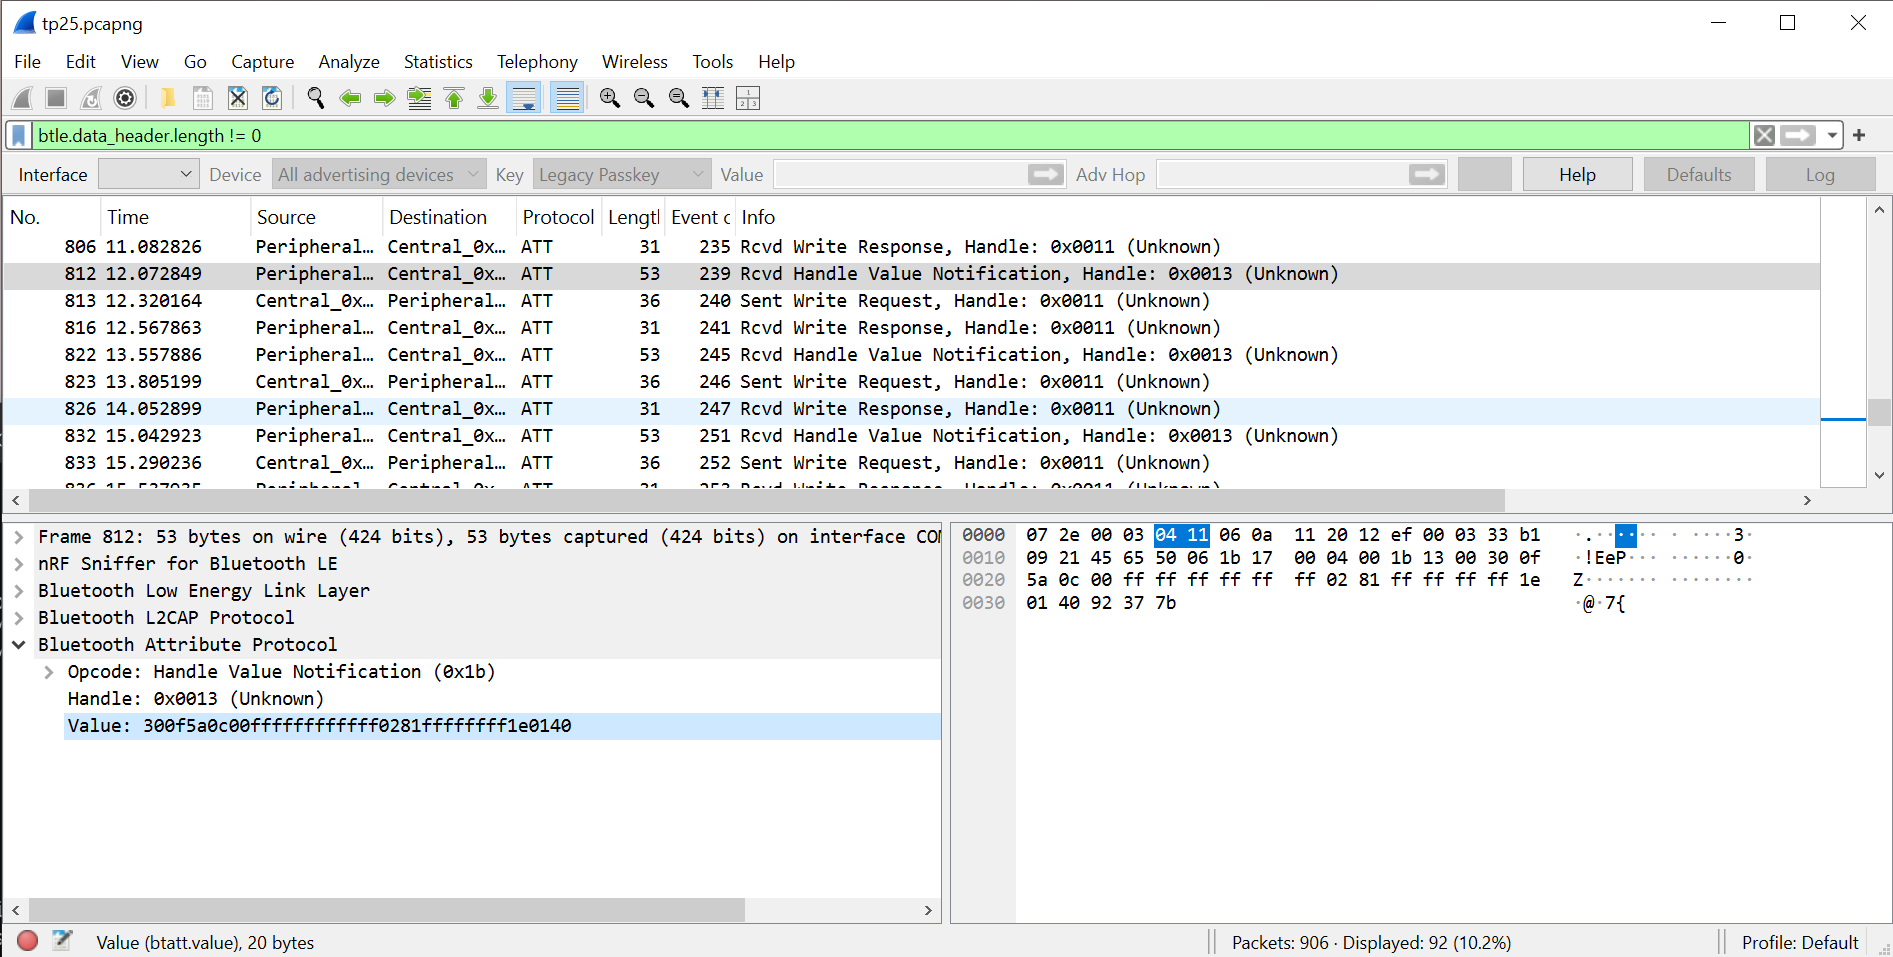
Taking a look at the TP25.
After getting everything set up, I was ready to try a capture. I'll go over it a bit more in the next post - but it was successful straight away. After filtering out the empty packets I can see notifications being sent, and the contents of them changing!
Conclusions
This was quite a successful exercise. I can now get data from the TP25 and see it changing! 🥳